


(or go to the main Hogweed page)
📆 When to Survey?
We now usually survey twice a year: once around the beginning of April, and a second one in late May – a “green-tick” inspection.
- First Survey: We get a complete record of where all the plants are. Plants often appear in the same places, but we need to find any new locations, and it is key for our annual statistics
- … then the landowners deal with all these plants on their land…
- Second Survey: This is our ‘green tick’ survey, when we hope to find nothing. But we take a spade and bags so we can deal with any plants which have newly sprouted. Or worse, ones the landowners have missed – as by now they might well be flowering (which is why we need the bags, to carry flower heads off-site). We usually do this in pairs with someone experienced. Then we can confidently put a green tick on the map!
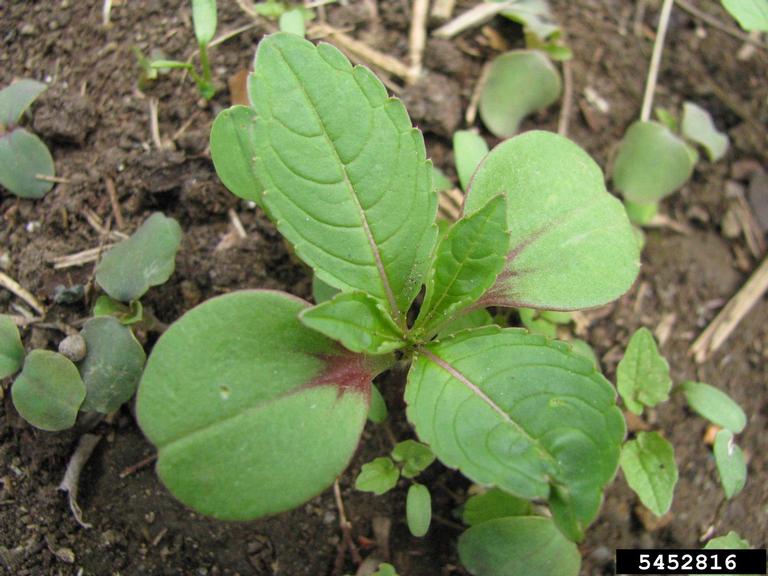
🌴☘️How to Recognise?🌱🌵
You need to become familiar with what the plant looks like, whether its young or mature – hopefully you will never see a flowering one, but vital to recognise if you do! Useful guides are:
- NNSS Leaflet or WildFoodUK ?website.
- It’s very easy to confuse with the much more Common Hogweed, even other Umbellifers.
- You also want to be able to identify Japanese Knotweed and Himalayan Balsam (and as a seedling).
Read these and then test yourself with our Quiz – which has easy, medium and hard questions!
🎵 What to Record 🎵
We want to record all the details we can, to help the landowner find them, and to monitor our overall progress.
- The Route
- Start & End a Track
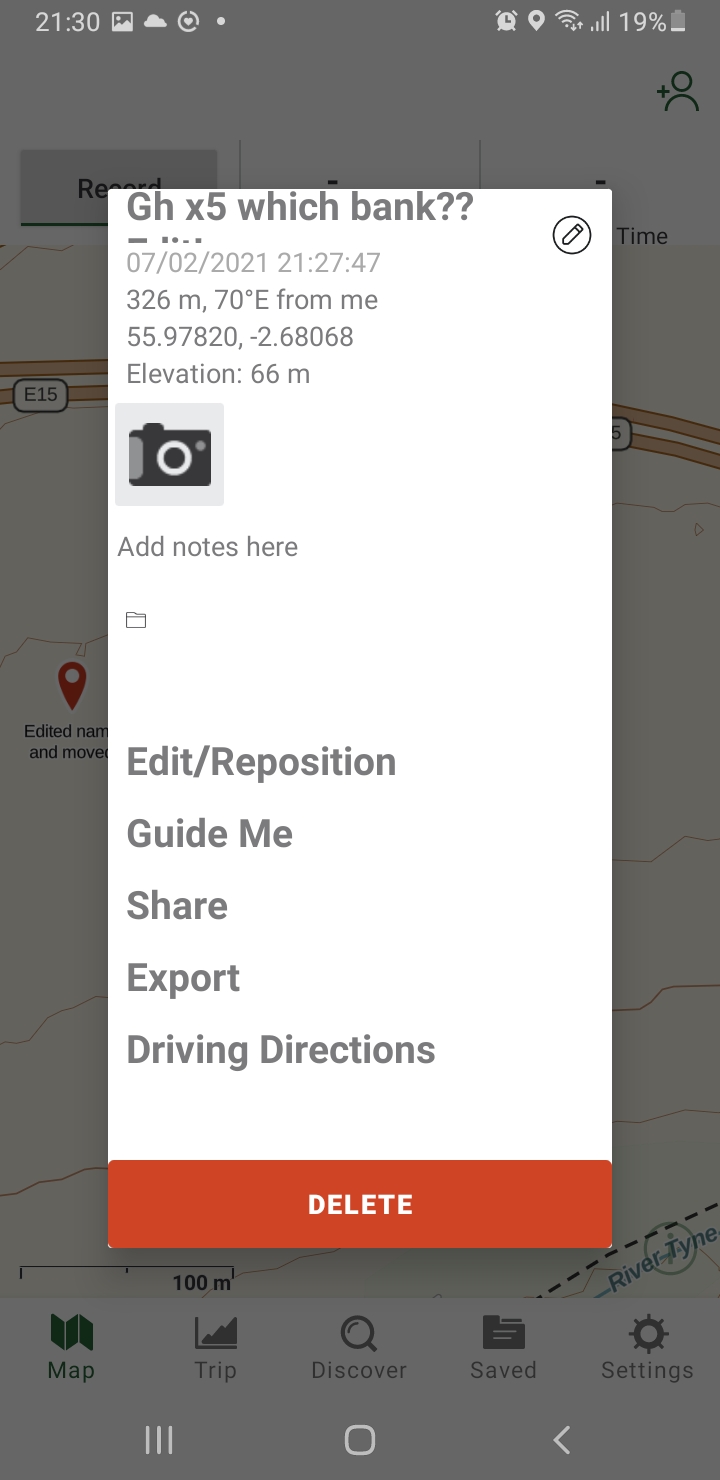
- Plant Details – overwite the date/time in the Name field with something like:
- GH x5 3ft left bank hidden in willows
- GH x1 flowering in woods off right bank. Reported in April but still there!
- JK 30sqm island by West Bank. Look as if sprayed
- Couldnt survey 20m upstream of here, too overgrown
- Details:
- Plant Type
- GH for Giant Hogweed
- JK for Japanese Knotweed
- HB for Himalayan Balsam
- or anything else noteworthy
- Quantity
- eg x5
- For JK/HB estimate the area, eg 20sqm
- Status
- eg baby (<6in), small (under 1ft), medium (under 3ft), large, flowering (hopefully not!)
- Bank
- Which side of the river its on, eg left bank (looking downstream)
- This is vital for anyone looking to treat the plant!
- Any other useful info (if long, put in Notes), e.g.
- Under tree; Hidden in bushes; opposite gate
- looks sprayed
- still not been treated despite 2 previous reports
- Dead, but has full seed head – must have been missed last year
- Plant Type
- NB: Timestamp is automatic
- Location, Date & Time get automatically recorded & exported by the software in the kml file
??Why Record All This??
- Bank: It is important to record on which side it is of any un-crossable barrier, like the river, or a railway, or road, as this is key for anyone planning to treat it, especially as it’s often a different landowner.
- Unsurveyed: If there’s a section you just can’t see well enough to survey, please record that as a waypoint too, so we know where hasn’t been checked. This could be overcome by scouting from the opposite river bank, or entering the water with waders, which some of us have, or you can borrow from the council rangers.
- Seen Before: If you spot a plant you have reported before (this year), please do report it again, and indicate this. It means no one has yet dealt with it, so will prompt us into further action (and means more accurate stats).
- Track: NB: If you forget to record a Track, record a waypoint at the start and end of the survey
📱How to Record using Gaia📱
We use a free app called Gaia. See below for how to use it. It is available on both Android and iPhones, although they look slightly different. See how to install here. For full information see the Gaia website here.
On the survey you:
- Record a Track, which plots the route you cover
- Record a Waypoint for each plant you spot (or anything else). Overwite the date/time in the Name field with all the details
- Email the Track & Waypoints, using Export
- On Android you export the Track, and all its waypoints are automatically included
- On iPhones you assign them all to a folder, and export that.
NB: Before you even leave the house, make sure the phone is fully charged up, because GPS drains the battery fastl
Practice!
We strongly recommend you practice this before you do it for real
- Outside, e.g. in the garden, so GPS works
- Email us your test results, and we’ll give you feedback
- Hide or delete your practice afterward (using Saved)


Key links
- Web Pages
- Emails
- Maps
Any questions – contact us!


